INGREDIENTS
Musubi
• 3 sheets of nori, or dried seaweed
• 1 cam of Spam, either regular, Teriyaki or reduced sodium
Marinade
• 1/4 cup water
• 2 tablespoons soy sauce
• 2 tablespoons oyster sauce (optional)
• 2-4 tablespoons of sugar
Rice
• 2 cups uncooked short grain rice
• 1 1/2 cups water (if using a rice cooker)
• 1/2 cup rice wine vinegar
• 1/4 cup sugar
• 2 tablespoons salt
Directions
1. Cook the rice, either in a pot or in a rice cooker.
2. In a microwave-proof container, mix the vinegar, 1/4 cup sugar and 2 tablespoons salt.
3. Microwave the vinegar for 1 minute and 30 seconds, and mix again, until the salt and sugar dissolve. Cool while rice cooks.
4. Remove the rice to a medium-large mixing bowl.
5. Pour the hot vinegar mixture over the rice and mix by the rice by using a cutting motion with the edge of a large, flat spoon or a rice paddle, if one came with the rice cooker.
6. Remove the Spam from the can in one piece and slice it into quarter-inch thick slices.
7. Prepare the marinade by mixing the 1/4 cup water, soy sauce, oyster sauce (optional) and sugar.
8. Place the Spam slices in the marinade for at least 5 minutes.
9. Heat a skillet on medium heat.
10. Remove the Spam slices from the marinade and cook the slices on both sides, until lightly browned. Remove to a plate.
11. Cut the nori into one-to-two inch strips, with enough strips for each slice of Spam.
12. Place a Spam slice in the center of a nori strip.
13. Place the empty Spam can on top of the Spam slice and fill the can with rice. Tamp down the rice until the can is only half full.
14. Carefully remove the Spam can, revealing a rectangular block of rice on top of the Spam slice.
15. Wet the tips of your fingers, move both sides of the nori to the top of the rice. Lightly wet the ends of each piece and lightly press them together at the top, creating the wrapping. They should stick together when lightly wettened.
16. Repeat the process for each Spam slice and serve, with optional lemon slices on top.
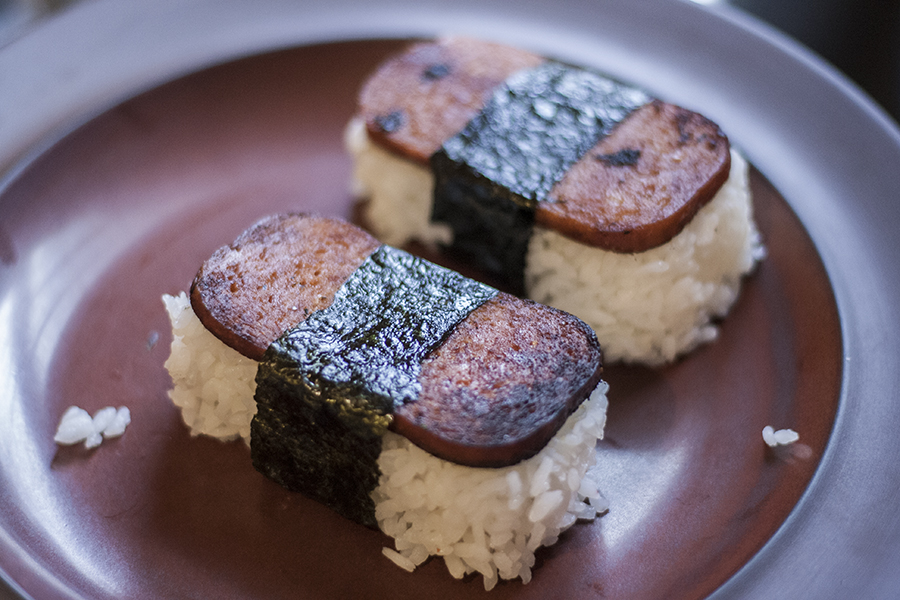
Spam musubi!
Below is a photo essay of the steps:
-

- Spam cut into slices before it goes into the skillet for some light browning.
-

- The spam has pan fried up nicely. Just a little brown. I cook on the grill because it doesn’t make the house smell.
-
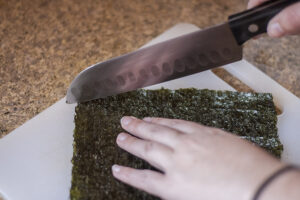
- Cutting the nori strips.
-
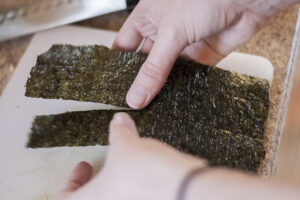
- The nori strips are separated.
-
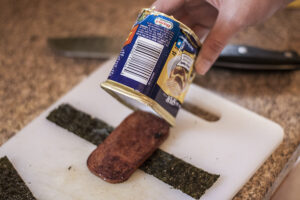
- Putting the spam container over the spam and nori to fill it with rice.
-
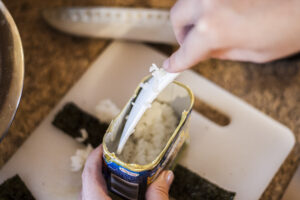
- Packing rice into the spam container, to form it on top of the spam.
-
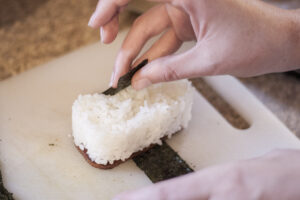
- Wrapping the nori around the rice and spam.
-
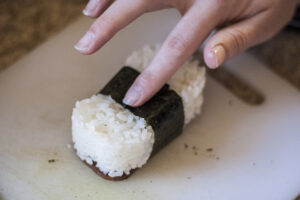
- Completing the nori wrapping.
-

- Spam musubi!